
Hi Frightners!
Todays post is one that highlights a new prop build I see making the rounds more and more over the last few seasons and it is the Haunted Tree.
"Trees?" Why yes I did say trees! While the main focus is usually on tombstones of all kinds, creepy crypts and various ghouls and ghost haunted trees seem to be making the rounds and finding their place in more and more haunt displays every year.
The world of haunting has really come a long way since I first started to really get into it back in 2007-08. The attention to fine detail has grown significantly. Even though our displays are situated right on our front lawns or throughout our homes and garages we all strive to make everything in them as realistic as possible and this includes the trees!
Just think about it, most cemetery's have trees, every creepy picture of a haunted house usually has creepy old trees surrounding it's grounds and there is even the classic movie The Halloween Tree by Ray Bradbury. It only seems right that we incorporate trees into our designs. Trees add an extra dimension to your display. So many of our props lie low to the ground but building up and adding larger standing structures helps create a more impactful scene and greater overall depth which gives the patrons that come to your haunt more to look at other than what is lying on the ground before their feet.
"So how do I build myself a haunted tree?" Well that's easy....kind of...I guess haha! In all seriousness there are many ways you can approach your design and I will just run down three which each supply their own effectfulness.
I will start with the easiest and that is cardboad. Cardboard is probably the most cost effective material you could use to create trees for your haunt mostly because you can usually find it for free though if you have to buy it it can be had for just a few dollars usually from stores like Staples, Office Depot or almost any home office type store. The two basic ways you can fabricate cardboard into trees are both pretty simple. The first is by creating a flat standee. Simply lay the cardboard out, trace the desired shape of the tree and cut out with an exacto knife. Once you have your tree shape you can paint as desired, add a wood or PVC stake to the back of it an ta-da your done. The second way you could fabricate your cardboard tree will add more dimension too it and that is by cutting out 3-4 identical sides of the tree. You will only need 1 half of the tree that way the straight edge of each tree can meet the others in the middle and be attached together using either glue or tape then paint as desired. The second version will provide a better 360 view for your audience but both are suitable for use in the background of your haunt. Of course the downside to cardboard is its durability, any long spans of time outside being open to any inclement weather will most likely damage your cardboard tree though there are different thickness of cardboard available which may help. Bottom line with cardboard trees are they are quick and easy to create, adding in some hanging spanish moss, vines or a few dying leaves to them and even a few fake prop birds will give your haunt that extra dimension but these won't last you too long so if your looking for some longevity from your trees the next two sets of ideas are more for you.


The second option is one I have used in my own haunt and that are wooded trees. Now I won't go into too much detail here because there assembly is along the same lines as the cardboard trees though you will need to create solid support structures for them as these can be pretty heavy. I was lucky enough to score a few large sheets of plywood when I was having my roof re-shingled so I went with the flat silhouetted version of creating the trees. They came together fairly quickly though it took a little time to engineer the supports and ensure they would be stable and not fall over. Now I know not everyone has large pieces of plywood just lying around so this version of fabricating trees can actually be a bit more expensive and yes the trees will be heavy and fairly large so you must think about storage however you can leave these outside and store them outside if you have the room so the durability is there.


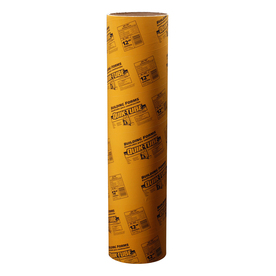
The last option is one I never really put any thought too until I started seeing it pop up the last two years and it's the one that got me thinking it was time to re-do my trees and of course create this post because I think the outcome of these trees once completed is great. So what is this magical new technique? Well it starts with Quik-Tube concrete forms. You might have walked past these forms while shopping at Lowes or Home Depot but never really gave them any thought much like myself but they actually work perfectly as the base form for your tree and at around $9-12 per tube they are fairly inexpensive. Now the techniques used with the tubes to form the tree vary. Some people choose to cover the tubes with greatstuff which acts as the tree bark, others use paper mache and then there is the technique of melting heavy duty plastic with a heat gun to form the bark. All of these techniques work fairly well and provide end results that make for a fantastic looking haunted tree! The tubes themselves also can provided you with a few extra cool effects. Because the tubes are hollow inside you can carve out a scary face into the tube and run lighting inside your tree and at night your evil face will glow very nicely. You could even choose to plum your tree with a hose hooked up to a fogger so that fog billows out of the trees face and mouth for a cool effect.


Haunted trees may not be at the top of your build list this October or even next but I do think they are very fun and easy builds that can add to your haunt and make it that much more unique and real. If you have built any of these style trees please feel free to share your techniques with us and pictures in the comments section below. Also while I don't know the makers of all the trees above I would like to give mention to: Mike Bachman & Eric Wilson who's haunted trees are shown under the concrete tube fabrication section. If you created or know the creators of the rest please make mention in the comments below so we can give the proper credit.
Happy Haunting!
Frightguy~


